Morse Code Snowflakes (a Christmas hack)
Another Christmas has come, and that means another trip to Montreal, laden with presents, luggage, and people. And, so I prepare to use my trusty, home made, cargo box. And, this year, I intend to adorn that cargo box with some Christmas cheer.
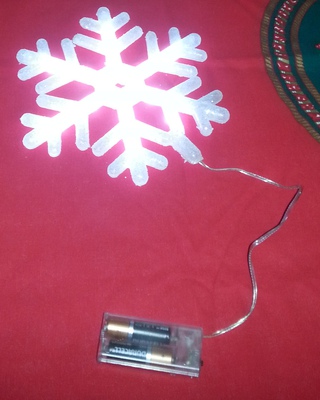
 I stopped in to the local "dollar store" to get some Christmas wrapping, and spotted some $2 LED "snowflakes". These 23cm diameter plastic, roughly snowflake-shaped objects take 2 AA batteries, and light up 12 imbedded white LED lights. "Just the thing", I thought, "to decorate the sides of the cargo box with." So I bought two of them.
And on the way home, I had a brainstorm. A while ago, I purchased some inexpensive microcontroller development cards, intending to see if I could use them in a home automation project. I now have a wealth of Arduino-like Chinese Digispark ATTiny85 clones, and I need suitable projects to learn their capabilities and limitations. And, as I can write code to control their outputs, I can use one of these devices to turn on and off the LED snowflakes. Why use a simple switch when a microcontroller would do?
Ok, so I embellished the project a bit alot. Instead of simply turning the lights on and off, I decided to see if I could make the lights flash in Morse Code. I wanted to have these snowflakes greet the Montreal-bound travellers with something Christmassy: how about "Ho Ho Ho Merry Christmas Joyeux Noel"?
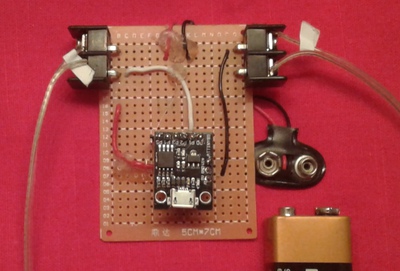
And so it happened that, on the Thursday before Christmas, and I spend most of the afternoon (and quite a bit of the evening) wiring up a Digispark card to a 9V battery and these two LED snowflakes, and designing, writing, compiling, uploading, testing, revising, recompiling, re-uploading, and retesting a small program that would flash out my Morse Code Christmas greeting. I should note that I totally disregarded the idea of making the setup electrically consistant. I did not figure resistances or voltages or amperages in putting this together; I simply figured that the Digispark board could sink the requisite amperage and that the two LED snowflakes would run on the approximately 4V that the ATTiny85's IO pin could source, and would depend on this lashup to work until I got home.


Now that I had Morse Code flashing snowflakes, it came time to mount them on my cargo box. This didn't take much; on the Friday before Christmas, I hot-glued the two snowflakes to the sides of my box, up near the front where the nose curves. Positioned with their leads facing down and back, I then routed the wiring through the side of the box and into the cargo compartment, just under the rounded nose. For protection, I mounted the Digispark in a plastic soap-bar container from the "dollar store", and mounted this container just under the top of the cargo box, in the centre of it's nose. The wires from each snowflakes, duct-taped to the floor and sides of the cargo box, extended through individual barrier strips, and terminated at the controller. A quick test showed that everything worked properly, and my cargo box now sported two flashing snowflakes to accompany us to Montreal.

- Side note:
- The Digispark ATTiny85 board only has about 8k of storage, of which about 2k is taken up with a bootloader. This means that any program I write for this little device must fit in about 6000 bytes. I could have wrote a small program that exclusively output my target Morse Code message, but I instead took it upon myself to write a general-purpose program that would output any message (of a reasonable size). I managed to keep the code small, even with this additional functionality; the program compiles down to 984 bytes, and uses only 49 bytes of dynamic memory.
| Attachment | Size |
|---|---|
| 2.92 KB | |
| 423.33 KB |
- Lew Pitcher's blog
- Log in to post comments

