Kitchen Carpentry
I have had an "odd" season at the cottage, this year. I opened the cabin late (after the May long weekend), and only managed to get up to the lake sporadically during the summer. Fall has now arrived, and I find myself planning for the cottage closing, sometime in October. I don't know that we really had a summer this year, and I certainly missed the cottage.
But, my inability to get up to the lake didn't interfere too much with the ongoing restoration and renovation of the cabin. My brother-in-law Serge and I took a week for fishing, and managed to not only clear several dead maples that threatened the cabin, but to install another five courses of styrofoam in the rafters. Those tasks alone made the cottage more livable. And, no, we did not catch any fish. But there's always next year.
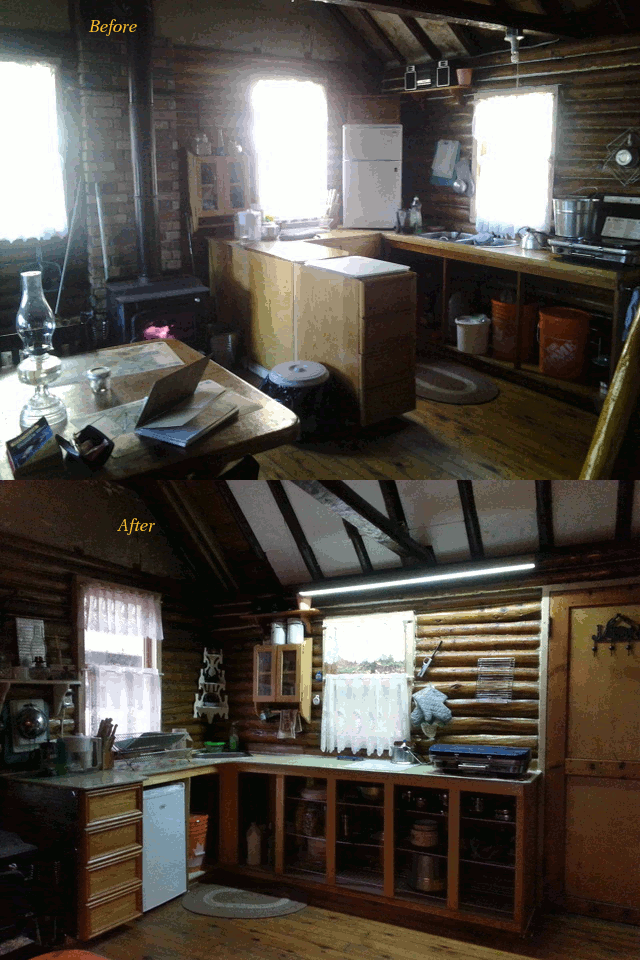
My big project this year saw the replacement of the kitchen counters. Fifty years ago, Dad installed a single counter (with no shelves) almost as an afterthought. Since then, Mom and Bob had "enhanced" that counter to include an inconveniently-placed double sink and drain, a wood box, a cabinet with a single shelf, and a cabinet of drawers. This changed the kitchen from a utilitarian linear counter into a tight "J" shaped workarea. Add to that a bar fridge, sitting clumsy in one corner of the "J", and you have a kitchen disaster. I had to change this, for my own sanity, and to reclaim some needed space.
Fortunatly for me, Mom had not fixed the additional cabinets and woodbox in place - last year saw Terry and I migrate the woodbox outdoors to the porch, and this past fall I drew up plans to correct the remaining deficiencies. I envisioned a single "L" shaped counter, with the kitchen drawers under the far end, close to the wood stove, and wire shelves running the length of the long stem. I would put a single bowl sink in the corner of the "L", and the fridge on the floor between the drawers and the corner. I'd have to move the drain (and patch the hole in the floor where the drain, and mice, used to come in), and the electrical connections. I would use 1/2 inch conduit to route the wiring under the cottage from the generator to a spot where it would ascend through the floor and terminate at a utility box; this should reduce the chances of mouse invasion through the holes, as any new hole would have a flange or shroud protecting it.

I built the counter at home, over the winter, spring, and (unfortunately) summer. Once designed and constructed, I disassembled it, transported it to the cottage, and over two stays (about a week of elapsed time), reassembled it on site. After, of course, Terry and I demolished the old counter, patched holes, cleaned the floor, and disposed of the old building material.
So, now the cabin has a new counter, with about 5 metres of shelving, an integrated set of drawers, a conveniently placed single bowl sink, and a proper place for the fridge. It affords lots of room and a clean and efficient workspace. Just right for cleaning and cooking those fish we haven't caught yet.
- Lew Pitcher's blog
- Log in to post comments


Comments
Never Satisfied
Building things accurately to fit a log cabin is a talent I have yet to master. Despite taking copious measurements (double and triple-checking each one as I went), I still managed to build the counter so that it had a two inch gap between it and the side wall. No doubt that the two-inch intrusion of the bottom log into the floor had something to do with the flaw in my design/construction. Not satisfied with the "80% perfect" job, I had to attempt to correct (or, at least, hide) the flaw.
And so, I took another trip up to the cottage, carrying a six-foot long piece of painted trim. It took a small bit of time, but I covered the gap properly with the trim (painted to match the counter), and it now looks as if I had planned that little bit of decorative work. Nice way to cover my assets, don't you think?
While I was there, I also installed a corner shelf that had come from Marya's grandfather's farm in Guelph. Repainted, now, to complement the counter, it brightens up that dark corner above the new sink. I also put in a doorstop by the back door; when opened exuberantly, the door would slam into the counter, marring both in the process. Now, the door stops at a judicious distance from the counter, ensuring that neither sustain damage.
So the cabin got a kitchen makeover for it's fiftyith anniversary, and I'm satisfied.
But, Terry tells me that she'd like to see doors covering the access to the shelves below the cabinets. I guess that there's always something to improve at the cabin.
Never Satisfied, Redux
Earlier this summer, I mused to myself how I might redesign and replace the light in the kitchen. Bob had installed a single incandescent bulb, mounted with it's electrical box to the underside of a beam that crossed the kitchen above the kitchen counter. It was functional and simple, but as ugly as sin, and only illuminated a small part of the counter.
The plan I came up with was to move the electrical box to the top of the beam, and hang a long light fixture crosswise below the beam. The fixture would extend from one end of the counter to the other, and would hide it's electrical connection in the space masked by it's crossing of the beam. I would use LED light tape and a small 12V converter to give the light; no more expendable bulbs to replace.
So, in the week or so since my trip up to install the trim on the counter, I built a light fixture; 61 inches long and 3 inches wide, with 150cm of LED light tape and a faux-Dark Walnut finish on it's exterior. I removed the old light and hung the new one this week, and what a difference it makes. Now, the light illuminates the entire counter, and it is no longer a pain to prepare and cook meals after dark. And, the fixture looks appropriate; it blends into the decor rather than standing out like a white glass wart.
And Terry still wants to see doors to hide the shelves below the counter. As I said, there's always something to improve at the cabin.
Still not satisfied
I still had this "not finished" itch with the kitchen, even after I closed up the cottage for the year. With the new countertop, I had taken to keeping a roll of paper towel next to the sink. Since I had no stand or holder for the roll, I simply stood it on end, in a round basket. That sufficed to confine the roll, but didn't look very neat. As I left the cottage, I formulated an idea for a proper Paper Towel Roll Holder, that I would build over the hiatus. To that end, I grabbed a section of Maple branch, and took that home with me.
Over the past couple of weeks, I've trimmed that branch to a reasonable length, urethaned it to a semi-gloss finish, and mounted it in a concrete base. The resulting "stick in a rock" looks neat, and will properly hold the paper towel roll. So, next spring, the kitchen gets a "bespoke" paper towel roll holder, crafted to match the feel of the cottage.

Cupboard Doors
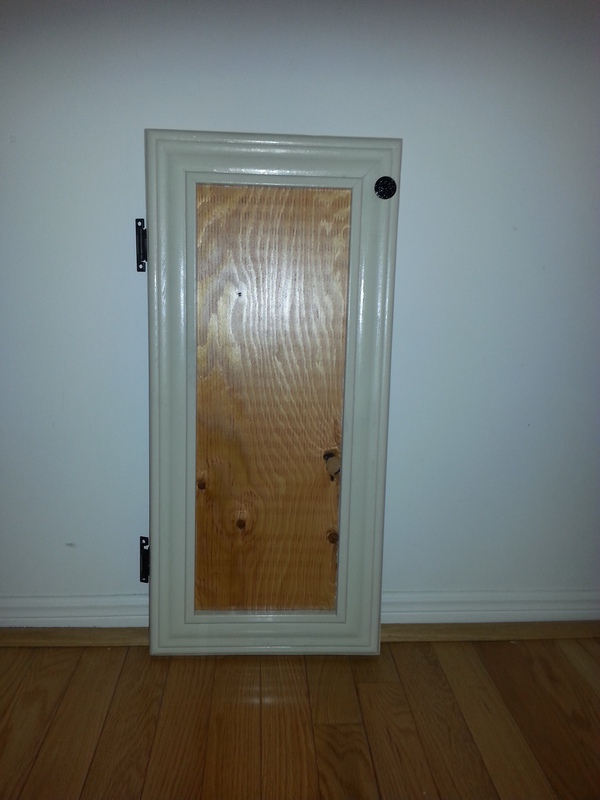
And, so, over the winter, I made cupboard doors for the cupboard.

And, now, the counter is as complete as it is going to be this year.